
No solder. No crimps. No wire made on site.
Every Chameleon light string, wire and tee arrives with the same waterproof twist-lock connectors (mini-X) already on its ends. On install day you drill, route and twist — and the snap-on aluminum track hides all of it. No wires and no screws show anywhere — like a chameleon, it’s made to blend in.
Official Chameleon installers use our kits and materials and are listed on our website, and Chameleon handles all customer support for the app. This page is how the parts go together — it’s not a certification, and there’s nothing to pass.
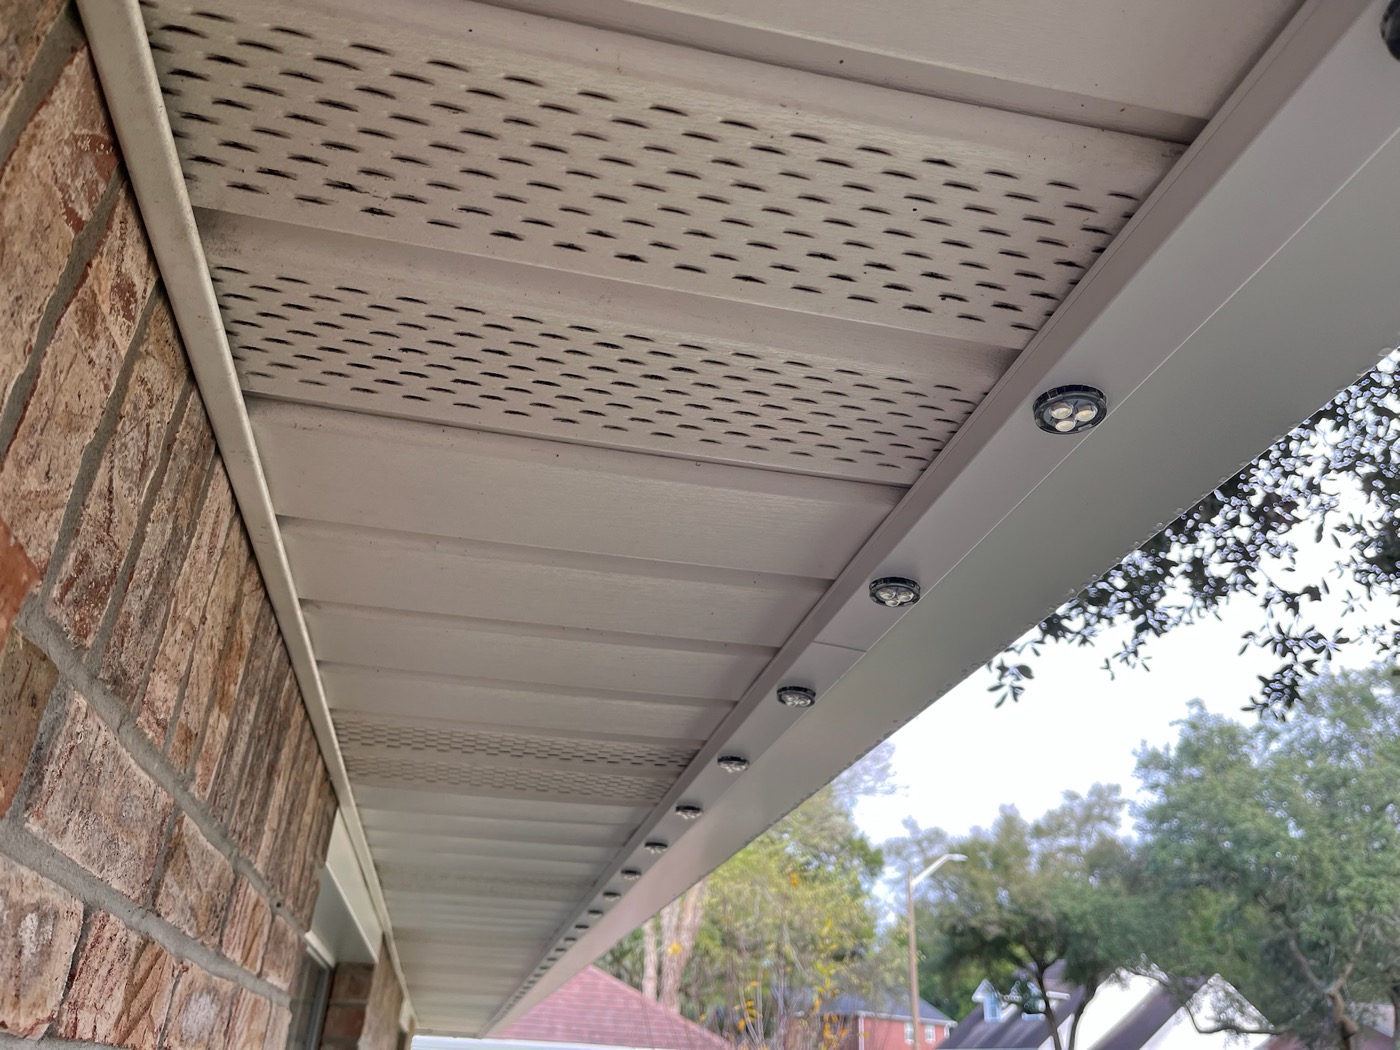
Hurricane-tested. Every Chameleon install in the Florida panhandle came through Hurricane Isaias without a single light falling off.
How the lights work
Every strand carries three conductors: 24 V power, ground and data. The controller box plugs into an AC outlet like a lamp, and everything downstream of it is 24 VDC.
Data travels one direction only: from the controller to the first puck. That puck relays the information to the next puck, and so on down the line. The circuit needs that forward communication, so:
- Every strand has a male end, where data comes in, and a female end, where data goes out.
- Male ends always point toward the controller, and a strand has no way of being connected backwards.
- Each puck drops the voltage slightly. After 75 pucks you need power injection — see section 6.
Check your local licensing. Some locations in the U.S. may require a low-voltage license to install it. The entire system is low voltage: the controller box plugs into an ordinary AC outlet, like a lamp, and everything downstream of it is 24 VDC. Check what your city, county and state require.
Your job, your responsibility. Chameleon is not responsible for the installation. The installer is responsible for the work, carries their own insurance, and assumes all risk.
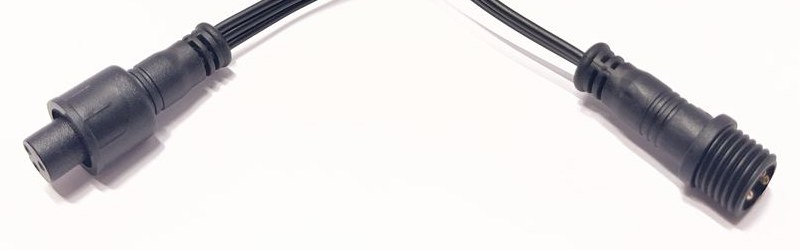
The connector (mini-X twist-lock)
Left: the female end, with its locking nut. Right: the threaded male end — the smaller of the two. Every light and every wire has one of each.
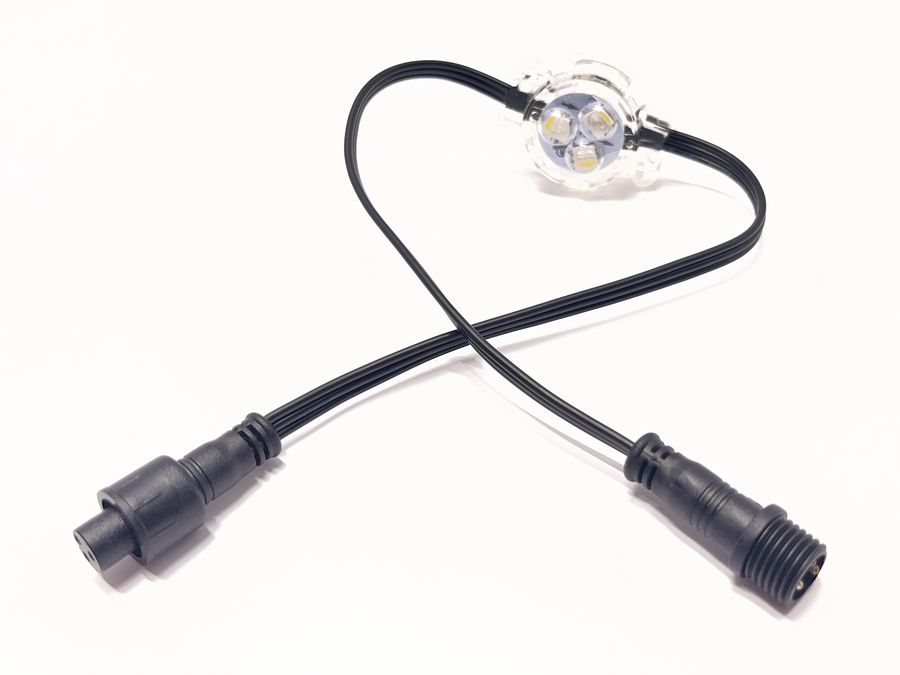
A single light: a connector on each end. Strings of five, every length of wire and the power-injection tees are the same.
One connector, on everything
There is exactly one kind of connection on a Chameleon install, and it was made at the factory. Line up the pins, push the two ends together and turn the nut until it’s snug. That joint is sealed against rain, sprinklers and humidity.
Male ends always point toward the controller box. On every light, every wire and every tee. Data comes in the male end, so if you’re holding a male end, the controller is that way — and there’s only one way to put a run together.
What you never do on site
- Strip, cut or splice wire
- Solder anything
- Crimp a terminal or a butt connector
- Heat-shrink a joint
- Use lever clips or wire nuts outdoors — they aren’t rated for wet locations
What you do instead
- Drill a 5/8″ hole wherever a wire enters the run
- Push the cable’s small male end up through it with a fish rod
- Run it back through the attic to the controller in the garage
- Twist everything together, male toward the controller
- At the very end of a run — no more lights — twist the waterproof plug into the last light’s female end
Cut the track, never the wire. At the end of a run a full track may not fit: cut the track to length and fill it with single pucks. If there’s a gap — a gable, a downspout, the garage — bridge it with 3′ flat wire or a 25′ section. Never cut a connector off: it can’t be put back on site, and that’s the point.
Four wires, connectors on both ends
Nothing comes on a spool. Every piece of wire is a fixed length with a waterproof connector already on each end, so you choose a length instead of cutting one.
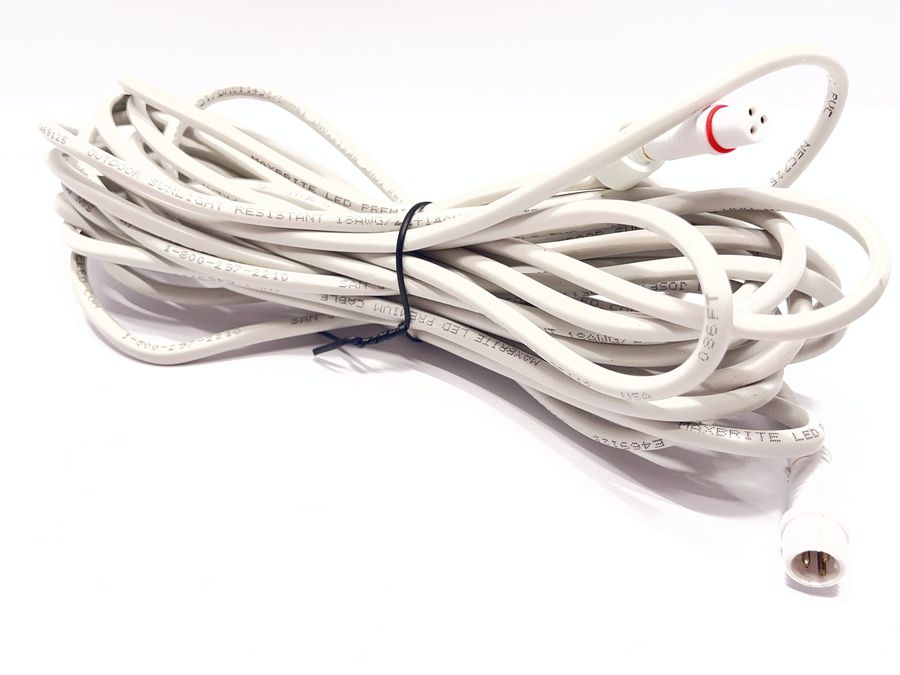
25′3-conductor, Class 2
24 V, ground and data, from the start of a run back to a controller channel. Approved for the attic: the male end goes up through a 5/8″ hole where the run begins and across to the controller.
25′2-conductor, Class 2
24 V and ground only, for power injection: from a power-injection tee’s 2-pin end back to one of the controller’s power outputs. The same attic approval, the same 5/8″ hole under the track at the tee.
Three conductors at a channel start, two at a tee — that’s the whole difference.
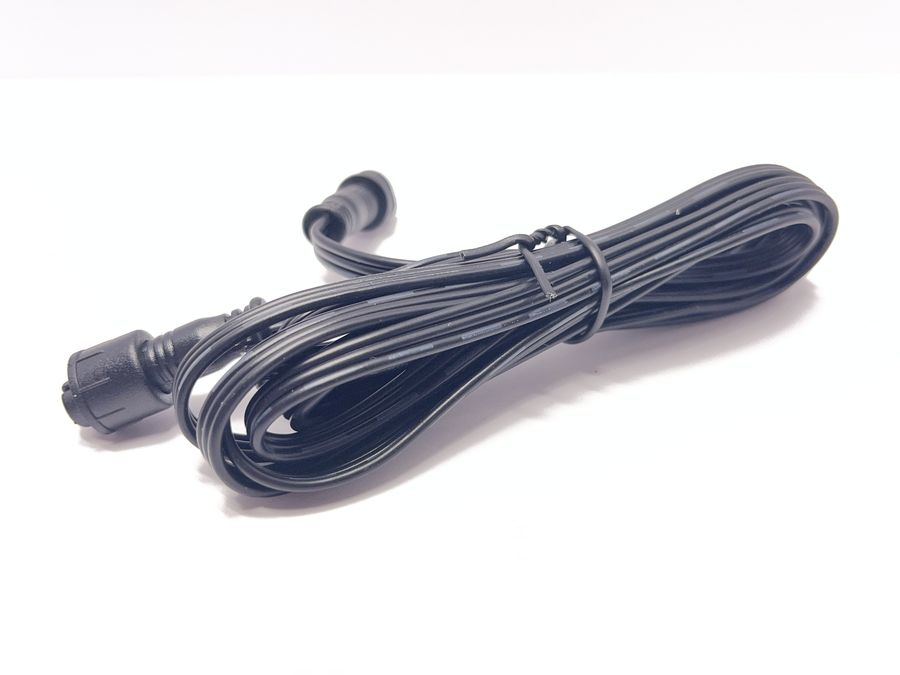
3′Flat 3-conductor
24 V, ground and data, for short jumps outside: around a corner, past a downspout, across a gap in the roofline. Flat, so it lies in the track or tight along the trim.
3′Flat 2-conductor
24 V and ground only: the short, flat version of the power wire, for short power jumps outside.
Up to four 25′ sections
Twist 25′ sections together to reach the controller — up to four, never more than 100 ft. Shorter runs are more reliable, so take the most direct path.
Stay away from AC power lines
In the attic, don’t run Chameleon wire alongside the house’s AC wiring — it can put interference on the data line. Give it some distance.
The DIY kit lists the 25′ wires as data and power extensions, the 3′ flat 3-conductor as a 3 ft data extension and the 3′ flat 2-conductor as a flat 2-conductor jumper — four of each.
Through a 5/8″ hole, under the track
The connector’s male end is small enough to pass through a 5/8″ hole. So wherever a wire has to reach the run — the start of each channel, every power injection, every jump across a gable — you drill one 5/8″ hole in the eave where the track will be. Work from the outside in: the male end is the smaller one, so feed it into the hole with a fish rod, push it over the wall header into the attic, and run the cable back to the controller box in the garage. The female end stays outside, the first light twists into it, and the track goes up over the top and covers the hole and the joint.
- Drill 5/8″ in the eave where the track will be — for a run, at its far left or right end.
- Feed the male end in with a fish rod (like this Klein glow rod set) and push it over the wall header into the attic.
- Run it back to the controller, adding 25′ cables as needed (up to four, never over 100 ft) and keeping clear of AC power lines. Leave the female end outside with enough slack to reach the first light.
- Twist the first light’s male end into the wire’s female end and tuck the joint into the track channel.
- Snap the track up over the hole onto its backtrack, which has a matching hole drilled in it (next section). From the ground you see lights — no wires, no screws.
Inside the house, Class 2 only. Anything that runs through the attic or a wall must be Class 2 rated (CL2 or CL3 on the jacket). Every Chameleon 25′ section is, 3-conductor and 2-conductor alike. Keep the 3′ flat wires to short jumps outside, under the track.
Did you know? Chameleon Lighting does local installs in the Florida panhandle — we hang this same system ourselves. If an attic or a soffit has you stuck, call or text (850) 393-1519 and we’ll help.
Screw up the backtrack, snap on the track
Every track section is 1 meter long with 5 puck lights, spaced 8″ apart — every track, every time, so the spacing stays right around the whole house. It comes in two pieces: a backtrack that screws to the house, and the track that holds the lights and snaps onto it.
- Cut 3″ off the first backtrack of a run, so it’s slightly shorter than its track, and drill a hole in it that lines up with the 5/8″ hole in the eave. Only the first one.
- Screw it up along the eave. It has 5 small predrilled holes; 2–3 screws per backtrack is fine. We recommend #9 × 1″ hex-washer-head, sharp-point screws, like these Teks roofing screws.
- Connect the track’s lights to the cable (male toward the controller) and push the track onto the backtrack until it snaps into place. It overhangs by 3″.
- Slide the next backtrack 3″ behind the previous track to line it up, and screw it up. Connect the next track’s lights to the previous ones, snap it on, and repeat down the run.
- At the end of the run, cut the track to fit and fill it with single pucks. Plug the last connector, and use plastic end caps on the tracks as needed.
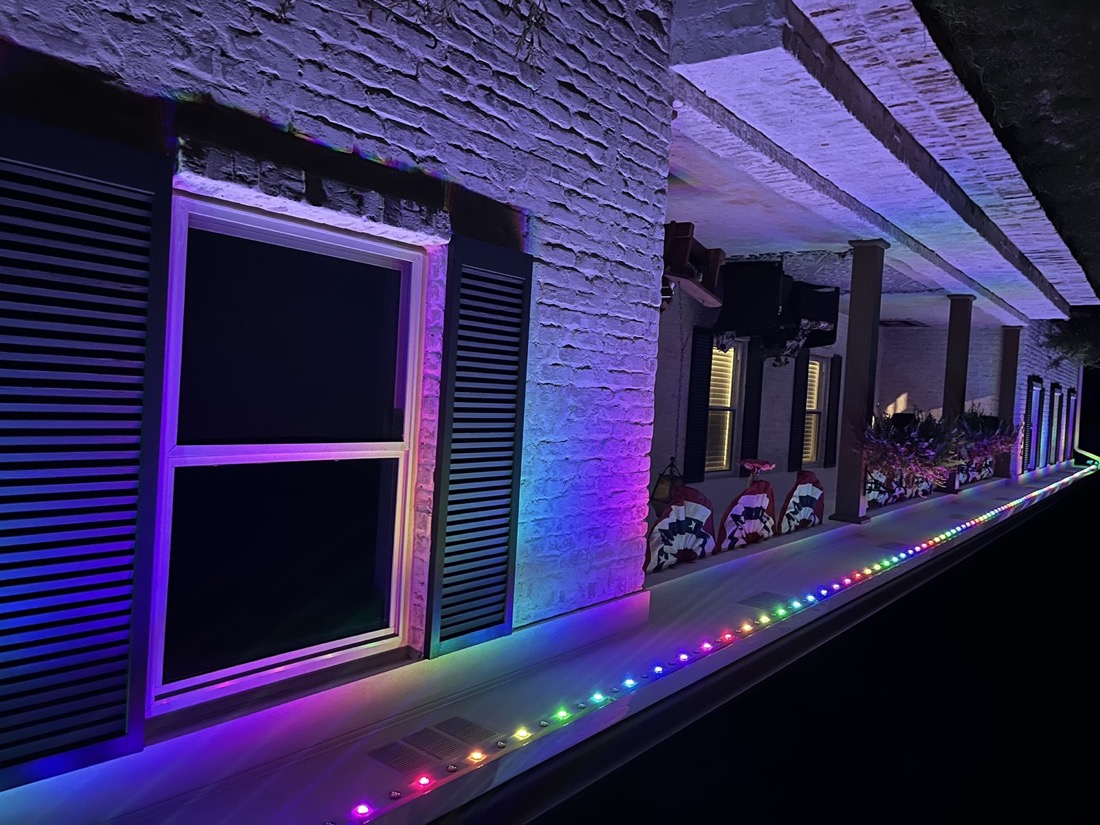
A very clean install. The screws go into the backtrack, and the track snaps on over them. When the job’s done, no screws and no wires are visible anywhere — just a clean line of lights. It’s in the name: a chameleon blends into its surroundings, and Chameleon is designed the same way — to stay hidden on the house until the lights come on.
Every backtrack after the first is full length, so the 3″ offset carries down the whole run and no track joint ever lands on a backtrack joint.
RGBW pucks with a 4000K white. Every light has red, green and blue plus a separate white emitter at 4000K — a clean, neutral white for everyday accent lighting that doesn’t have to be mixed from color.
Every 75 lights: a new channel or a power injection
Voltage drops along a run. Past about 75 lights the far end dims and the whites drift warm. So after 75 lights — about 50 ft, or 15 tracks — the run gets fresh power one of two ways.
Option A · Start a new channel
From where the next section starts, push a 25′ 3-conductor section’s male end up a 5/8″ hole and run it back through the attic to the next channel on the controller. The best choice where the roofline breaks anyway — the garage, a gable, the back of the house — and it makes a natural zone.
Option B · Power injection
Twist a power-injection tee in between light 75 and light 76. Its male 2-pin end takes a 25′ 2-conductor section, which goes up its own 5/8″ hole under the track and back through the attic to one of the controller’s power outputs. The data carries straight on; the next 75 lights get fresh 24 V.
Count the feeds
Divide the lights in a run by 75 and round up. That’s how many power feeds it needs. The channel itself is the first; every other one is a tee or a new channel.
1–75: one channel · 76–150: one more feed · 151–225: two more · 226–300: three more.
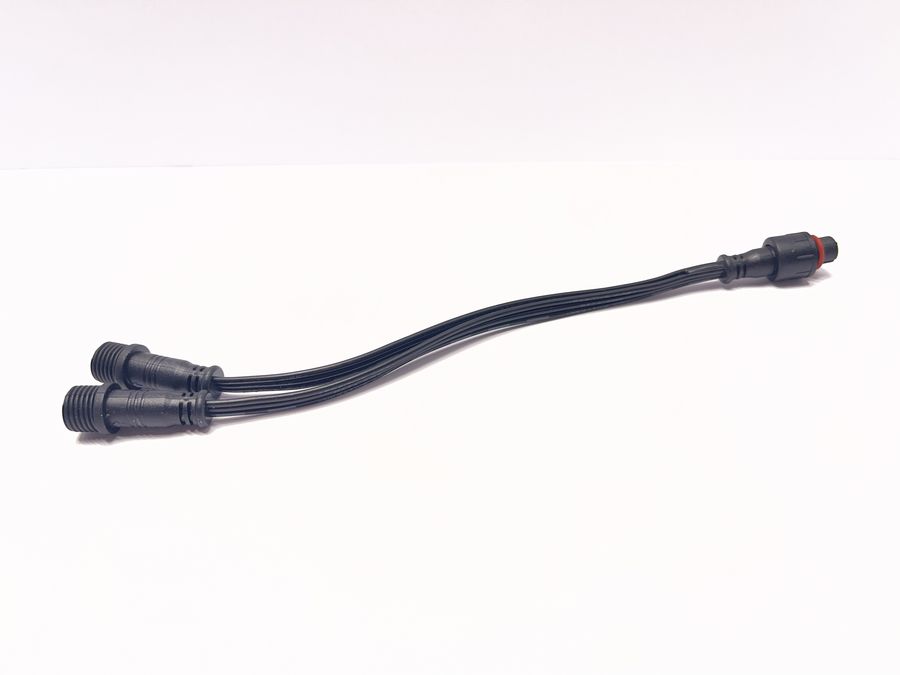
The tee only fits one way
Connectors on all three sides: female 3-pin (right), male 3-pin and male 2-pin (left). Both male ends point toward the controller: the 3-pin into the female end of light 75, the 2-pin into the power wire. Light 76’s male end goes into the female 3-pin. Lights come in strings of five, so it lands on a string joint — no cutting.
A tee doesn’t change the count
An injection adds power, not a channel. A run of 150 lights with one tee is still 150 lights on channel 1 when you set it up in the app. A new channel is counted on its own.
Worked example: the 100 ft kit. 155 lights is three feeds (75 + 75 + 5). On one straight roofline that’s channel 1 with two tees, at lights 76 and 151. If the house turns a corner into the garage, start channel 2 there instead of the second tee. The controller has four channels and four power outputs, and the kit ships four tees and four 25′ 2-conductor sections, so either layout uses parts already in the box.
Did you know? Chameleon Lighting installs Chameleon locally in the Florida panhandle. Not sure where your tees or channels should go on a house? Call or text (850) 393-1519 and we’ll talk it through with you.
The install, step by step
Always start at the controller. Before you climb, count the lights on each run and mark every 75th: that’s where a power injection or a new channel goes.
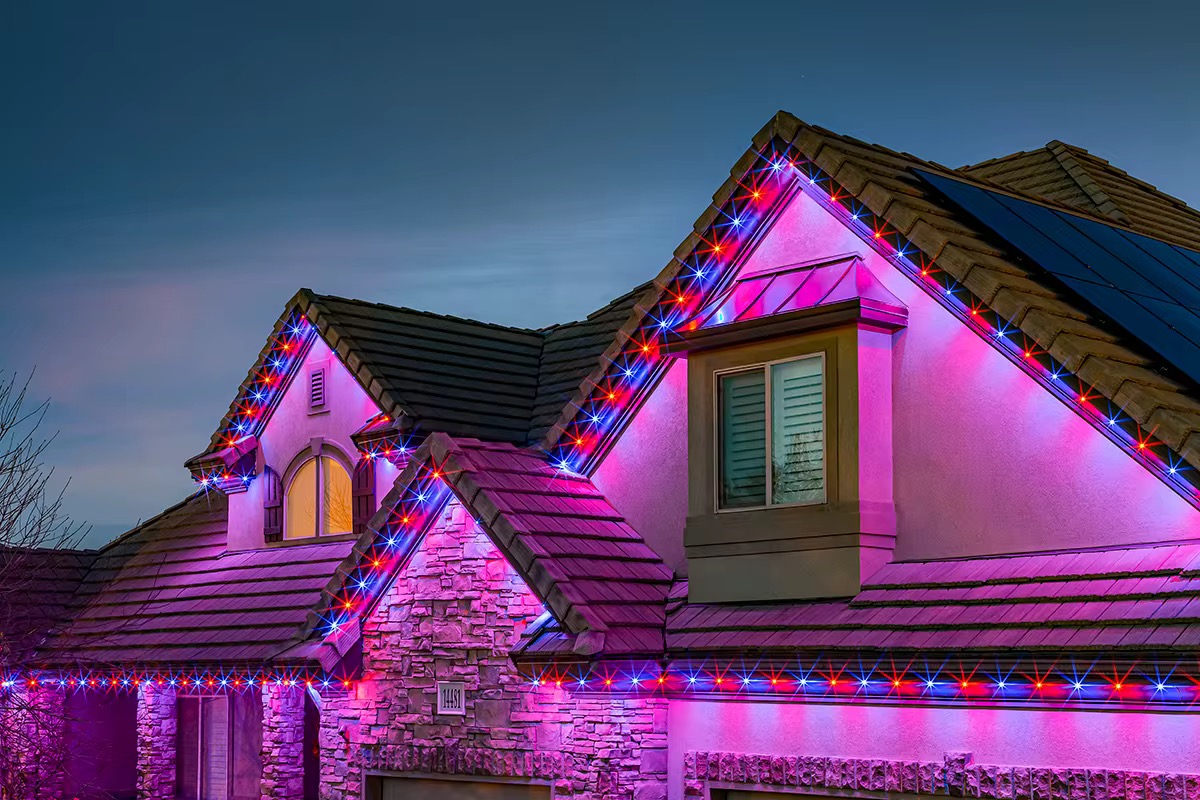
Did you know? Chameleon Lighting does local installs in the Florida panhandle, so we’ve done these steps on our own jobs. Any question on a job — a tricky peak, a run that won’t light — call or text (850) 393-1519.
Then set up the controller in the app: installer setup covers channels, light counts and zones.
2 people · a typical 100 ft house with 4 channels and a gable roof
1 person · a 100 ft straight shot on a ranch-style home
recommended for running lights
What those hours pay: a typical 100 ft job at $20–$30 per foot.
Questions
Do I need an electrician’s tools?
No. The controller box plugs into an AC outlet like a lamp, everything past it is 24 VDC, and every connection is a factory-made twist-lock connector. You need a drill with a 5/8″ bit, a stud finder, a fish rod (like this Klein glow rod set), #9 × 1″ screws and a ladder.
Why 5/8″?
It’s big enough for a connector’s male end — the smaller end — to pass through, and small enough for the track to cover completely. That’s why wire goes in from the outside: the male end leads, through the hole and back to the controller. Drill on the track line so every hole ends up hidden.
What’s in the wire?
Three conductors: 24 VDC power, ground and the data line. The 2-conductor wires (25′ and 3′ flat) carry just 24 V and ground, for power injection.
Where does the controller go?
Always start with the controller in the garage, near a power outlet. Mount it to the wall — into a stud if you can — plug it in, and drill a 5/8″ hole in the ceiling straight above it into the attic, using a stud finder to miss the trusses.
Can a strand be connected backwards?
No. Data only travels one way, from the controller to the first puck and on down the line. Each strand has a male end where data comes in and a female end where it goes out, so there’s no way to connect one backwards.
Which way round does a connector go?
Male toward the controller box, always — on lights, wire and tees alike. The power-injection tee only fits one way: female 3-pin away from the controller, male 3-pin and male 2-pin toward it.
How far can the lights be from the controller?
Up to 100 ft: chain up to four 25′ cables, and don’t exceed 100 ft. Shorter runs are more reliable, so take the most direct path, and keep the cable away from AC power lines to avoid interference.
Can I cut a string to make a run fit?
No. Cutting a string destroys a factory connector you can’t replace on site. Cut the track instead: at the end of a run, cut it to fit and fill it with single pucks. Bridge gaps with 3′ flat wire or a 25′ section.
My run is 80 lights. Can I skip the injection?
No — past 75 the far end dims and its whites drift warm. Put a tee at light 76, or move those lights to their own channel.
Tee or new channel — which is better?
Either powers the next 75 lights. Use a new channel where the roofline breaks anyway, or where the homeowner may want a separate zone. Use a tee to keep one continuous run on one channel.
Does an injection tee need its own channel in the app?
No. The tee only adds power. Count every light on that data line, before and after the tee, as one channel when you set pixel counts.
Which wire goes where?
25′ 3-conductor from the start of a run back to a controller channel. 25′ 2-conductor from an injection tee back to a controller power output. 3′ flat 3-conductor and 2-conductor wires for short jumps outside. Anything that passes through the attic is one of the 25′ Class 2 sections.
What about the end of a run?
The waterproof plug is only for the very end of a run: when no more lights follow, twist it into the last light’s female end, which points away from the controller. Then finish the track with an end cap.
How does the track go up?
Cut 3″ off the first backtrack and screw it to the house — it has 5 small predrilled holes, and 2–3 screws per backtrack is fine — then snap the track, lights and all, up onto it. The track overhangs by 3″, and the next backtrack slides into that overhang so it’s already in line while you screw it up. The track covers the screws, so none show. Each section is 1 meter with 5 lights at 8″ spacing.
What screws should I use?
#9 × 1″ hex-washer-head, sharp-point screws, like these Teks roofing screws from Home Depot. 2–3 per backtrack is fine.
What kind of white is it?
The pucks are RGBW: red, green and blue plus their own white emitter at 4000K, a neutral white.
How long does an install take?
A typical 100 ft house with 4 channels and a gable roof takes 2 people about 6 hours. A 100 ft straight shot on a ranch-style home can be done by 1 person in about 6 hours. We recommend 2 people for running lights.
Who supports the homeowner after I leave?
Chameleon, for every customer. All customer support for the app is handled by us, so send the homeowner our way for anything in the app.
Where do the parts come from?
Official installers use Chameleon kits and materials — the lights, track, backtrack, wire, tees and controller this page describes. You don’t have to buy full kits: we work with installers on partial kits and on just the materials you’re low on, à la carte. See the kit, or contact us.
Do I need a license?
It depends where you work. Some locations in the U.S. may require a low-voltage license to install it. The entire system is low voltage: the controller box plugs into an ordinary AC outlet, like a lamp, and everything downstream of it is 24 VDC. Check what your city, county and state require.
Who is responsible for the install?
The installer. Chameleon is not responsible for the installation. The installer is responsible for the work, carries their own insurance, and assumes all risk.
Will it stay up in a storm?
Every Chameleon install in the Florida panhandle came through Hurricane Isaias without a single light falling off.
You hang the lights. We take the calls.
Chameleon handles all customer support for the app — setting up schedules, adding holidays and teams, sharing with the family, the questions that come in November. Your job is done when the lights are up and working.
Our kits and materials
Every official installer uses Chameleon kits and materials — the same lights, track, wire and controller on every house, so every job goes up the way this page describes. See the kit.
Listed on our website
Homeowners find installers on our Installation page. Become an official installer — no fee, and we add you once you’ve bought a kit.
App support is ours
Point the homeowner to Chameleon for anything in the app. They can call or text (850) 393-1519 or email [email protected].
Stuck on a job? Call an installer.
We don’t just make Chameleon — we put it up ourselves in Okaloosa County, Florida. Odd rooflines, tricky attics, a run that won’t light: we’ve probably hit it, and we’re happy to talk you through it. Call or text (850) 393-1519, or email [email protected].